How to install fonts during the installation process
CreateInstall allows you to easily install fonts during the installation process. At the same time, installing the font consists of two steps. First, you need to decompress the font file to the font directory, and then register the installed font in the system.
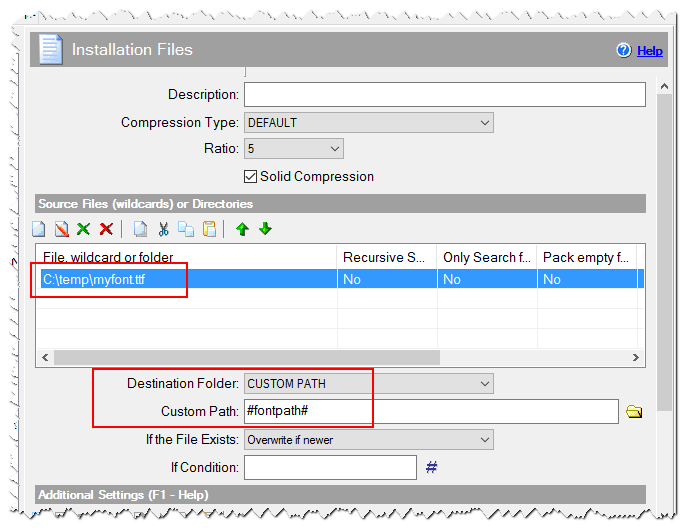
Consider these steps in more detail. Suppose you have the font myfont.ttf, which you want to install with the installation program. Add command Installation Files and specify your font file there. Windows allows you to install fonts to any directory, but there is a special directory Windows/Fonts, where we recommend you to install the fonts. There is a predefined variable fontpath, which contains the full path to this directory. Thus, specify the Destination Folder as CUSTOM PATH , and the field Custom Path as #fontpath#.

Installing the font file
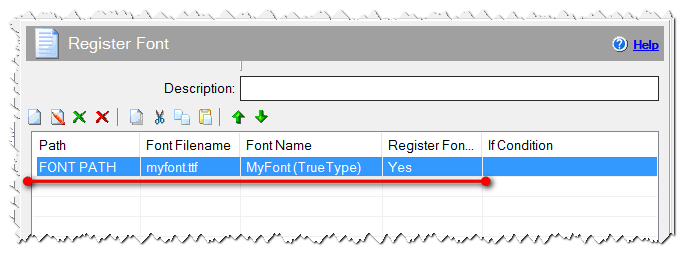
After that, you should register your font in the system by using the Register Font command. You should specify the full path to your installed font and the font name. Also, do not forget to check the checkbox 'Register Font Permanently'. The path can be specified in the following ways
# Method 1
Path: FONT PATH
Font Filename: myfont.ttf

# Method 2
Path: CUSTOM PATH
Font Filename: #fontpath#\myfont.ttf
The second method is more versatile as it allows to register the fonts in any directory.

Register font
