Get to know the CreateInstall installer
Let's say you have an application and you want to create an installation, with which users could install your program onto their computers. Here, we will consider the simplest option, in which it is necessary to install the program into a directory specified by the user and create shortcuts. In addition, it is necessary to include an uninstaller into the installation so the user can delete the installed application in the future. We will create the project in the full version of CreateInstall, but will only use basic functions of the installer, which are available in the free version as well. At any stage of work on a project, you may launch the installation and check to see that it works.
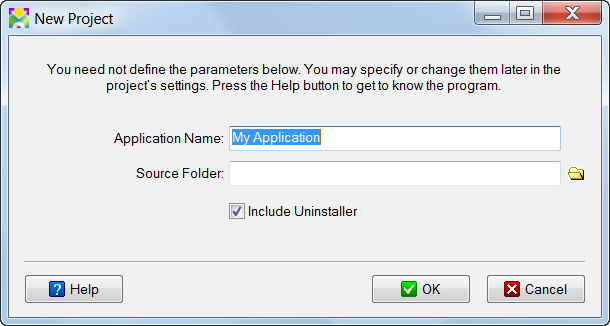
We will begin from the CreateInstall installer startup, and create a new project there. In the New Project window you can specify the name of the program, a source directory with program files and the option to add an uninstaller into your installation. None of these parameters are required, and you can always specify or change them in the future in the project’s settings. We’ll only specify the name of the program My Application and check the “Include Uninstaller” checkbox. After we press the OK button, a new project will be created and you will see three tabs: Project, Install Script and Uninstall Script.

New project
Let’s go to the Install Script tab, where our installation’s script is located. By default, the commands are divided into groups, but they can also be viewed in a general list. If some commands are not accessible in your version of CreateInstall, they will be shown in gray. In the full version you can use all the commands. Commands are added into the script with a double click or by pressing the Add button, located beneath the list.
The script of the installation is located in the center panel. The list of commands is presented as a tree, because some commands can contain others. Commands can be copied, pasted, deleted and also enabled or disabled (if the command is disabled, it will be shown in gray). All parameters for the current command are shown on the right side. The Uninstall tab, in which all editing of the uninstallation takes place, is organized in the same way. Thus, you can completely control not only the installation script, but also the script for the deletion of the program from the user's computer. Your installation will execute only the commands that are indicated in your script, and only in the indicated order.
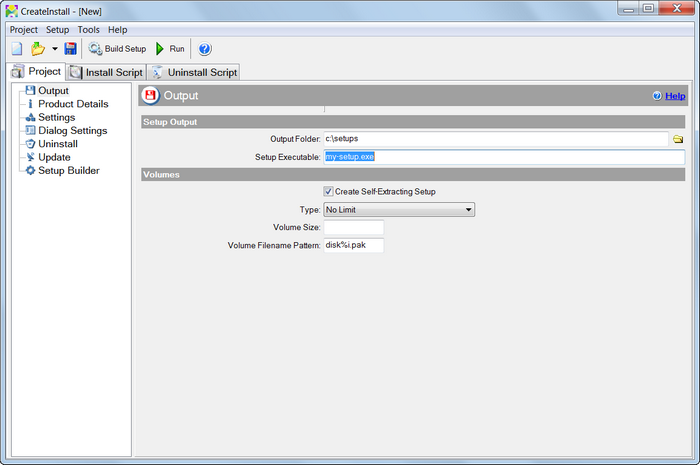
The Project tab contains several pages with general settings of your project. For example, you can specify the name of the installation file and directory, in which the installation will be written (by default, c:\setups) on the first page, Output. Let's specify my-setup.exe as the file name. For the creation of the first installation we won't handle all the parameters of the project; you can do that on your own. Every command and page has a Help link in the upper-right-hand corner, with which you can go to the relevant help page.

Project - Output
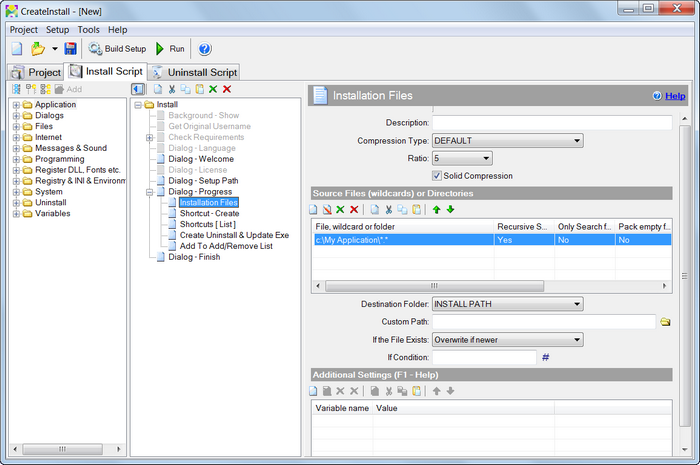
Now let's directly move on to changing the installation's script in the Install Script tab. The most important thing is that we need to specify necessary files of the application, which need to be installed. In the command list, find the already added command Installation Files, and specify the directory with your program there. Create the directory c:\My Application and duplicate some files there. We will specify this directory as the source directory with files, which need to be included in the installation.

Installation Files
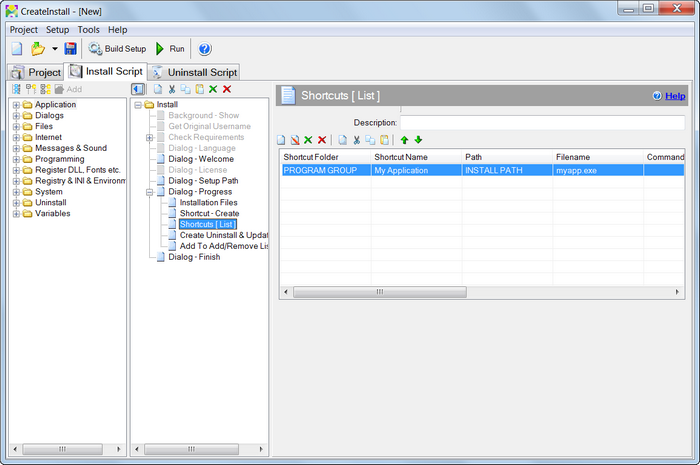
Now, you can already create and receive a finished installation for the program My Application. By default, the option to add an uninstallation is enabled when you create a new project. Let's say we want to create a shortcut for our program, myapp.exe, which we are installing. We go to the command Shortcus[list] in the installation script and add one element with the name of the shortcut, My Application and the file to be launched, myapp.exe.

Shortcuts
Our project is finished. We can launch the creation of our installation and check the result. After the installation my-setup.exe loads, you should see something like this script:
Dialog window with greeting
Dialog window with a choice of path
Dialog window of the installation
Dialog window indicating successful completion
Now we can check the uninstaller. Go to Start – All programs – My Application and start Uninstall. You can also launch the uninstallation of the application in Control Panel – Add and remove programs.
As you see, the creation of the simplest installation didn't take us much time, and didn't require many operations or lengthy study. CreateInstall offers a gigantic choice of commands for your installations and limitless flexibility in the creation of installation scripts, but at the same time our installer doesn't require additional knowledge or effort to create simple installations. You can even begin to work with the free version and you won't need to relearn or convert your projects upon switching to more advanced versions of CreateInstall.
![]() Download the example project get-to-know-installer.ci
Download the example project get-to-know-installer.ci
